Showing posts with label dessert. Show all posts

Sunday, November 27, 2011

Cranberry Strippers


I was looking around online at recipes to use up Thanksgiving leftovers, and saw a photo of some thumbprint cookies that someone had made using leftover cranberry sauce. Sounded like a good idea to me, and here is my version. Those of you who have been reading this blog will recognize these cookies: I have posted the recipe for them before using apple butter instead of cranberry sauce. You can really use any type of jam-like product you like. They are also delicious with raspberry or apricot jam.

I have changed the glaze for this version a little bit by using orange juice instead of lemon juice. Orange is such a nice pairing for cranberry, and I thought the added sweetness would help offset the tartness of the cranberry sauce. After the fact I thought that Cointreau or Triple Sec might make a nice glaze, too. If you try that, let me know how it works out.

Cranberry Strippers

1/3 Cup Sugar
5 Tbsp Butter, softened
1 1/2 tsp Vanilla Extract
1 Large Egg White
1 Cup All Purpose Flour
2 Tbsp Cornstarch
1/4 tsp Baking Powder
1/4 tsp Salt
Cooking Spray or Parchment Paper
1/3 Cup Cranberry Sauce
1/3 Cup Powdered Sugar
2 - 4 tsp Orange Juice
1/4 tsp Vanilla Extract

Preheat Oven to 375

Beat sugar and butter with a mixer at medium speed until well blended, about 5 minutes. Add the vanilla and egg white, beat well. Combine the flour, cornstarch, baking powder and salt in a bowl. Add the flour mixture to the sugar mixture ans stir until well blended.

Turn the dough onto a lightly floured surface and divide it in two. Roll each half into a log about 12 inches long. Place the logs about 3 inches apart on a cookie sheet or baking pan coated with cooking spray (I used parchment paper instead). Using the handle of a wooden spoon, make a 1/2 inch indentation down the length of each log. Spoon the cranberry sauce into the center. Bake for 20 minutes or until lightly browned. Remove to a cutting board.

Combine the powdered sugar, orange juice, and vanilla extract. Stir well with a fork and drizzle over the logs. Cut each log diagonally into 12 slices, but don't pull the slices apart yet. Let rest on the cutting board for 10 minutes, then remove to a wire rack to cool.

For a printer-friendly version of this recipe, click here.

Monday, June 27, 2011

Strawberry Puff Pastry Galette


Here is another quick and easy one. I received 2 baskets of strawberries from the CSA last week, and while we usually just eat them for breakfast until they are gone, for some reason we haven't been recently, so I had strawberries that needed to be used up ASAP. Luckily, there was also a lonely sheet of puff pastry in the freezer, and here you go!

1 Sheet Frozen Puff Pastry
1 Pint Strawberries
1 tsp - 1 Tbsp Sugar
One Egg
3 Tbsp Strawberry Preserves, Jam or Jelly
1 Tbsp Cointreau, Rum or Water

Remove Puff Pastry from the freezer and allow to thaw on the counter for 40 minutes

Preheat Oven to 400

Wash and slice strawberries into about 1/4 inch slices. Stir in sugar. If your berries are very ripe and sweet, 1 tsp should be enough. Use more sugar for tart berries. Allow to macerate while the oven comes up to temperature.

Beat the egg in a small bowl. Once the pastry is thawed, place it on a baking sheet lined with parchment paper. Fold in about 1 inch all the way around to allow the pastry to puff up around the strawberries. Brush the border with your egg wash.

Pile the strawberries into the center of the pastry, reaching all the way to the folded over border. Place the baking sheet in the oven and bake for 15 minutes.

Meanwhile, whisk the preserves, jam, or jelly with the liquid of choice. As soon as the galette comes out of the oven, brush the berries with the jam mixture. Remove to a cooling rack and cool to room temperature before slicing.


For a printer-friendly version of this recipe, click here.

Tuesday, June 14, 2011

Chocolate Beet Cake


Chocolate beet cake. Yes, you read that right. I admit it sounds odd, but the cake is actually quite delicious. I was suspicious of this recipe when I first read it in a Live Earth Farm newsletter years ago, but as the beets were piling up I decided to give it a go. I was glad I did. And who knows, if you don't tell anyone there are beets in the cake, they may never catch on!


I usually use regular red beets for this recipe, but this time I didn't have enough, so I used some chiogga beets as well. They are the stripey ones.


I chose to make cupcakes this time, because they freeze well in nice little individual servings, but you could use a bundt pan or 8-inch round or square pan as well.


Chocolate Beet Cake


1 1/2 pounds Beets (or enough to make 1 1/4 cups puree)
3 Eggs
1 1/2 Cups Sugar
1/2 Cup vegetable oil
1 tsp Vanilla
1/2 tsp Salt
1 1/2 Cups All Purpose Flour
3/4 Cup Cocoa Powder
1 1/2 tsp Baking Soda

Cook the beets either by boiling in water to cover by 1 1/2 inches until tender, or baking them in a 400 degree oven. Once they are cool enough to handle, slip off the skins (I like to do this under cold running water) and put them in a food processor. Process until a puree forms, adding water or beet cooking liquid if necessary to get a pureed consistency.

Preheat the oven to 350

Lightly grease and flour a bundt pan, 8-inch round or square baking dish, or line muffin pans with cupcake liners.

Whisk the eggs in a medium bowl. Whisk in the sugar, vegetable oil, vanilla, salt, and beet puree. In a separate bowl, combine the flour, cocoa powder, and baking soda. Add the wet ingredients to the dry a bit at a time until completely incorporated.

Pour the batter into your prepared pan and bake 45-50 minutes for a bundt pan, 35-40 minutes for an 8-inch square pan, and 15-20 minutes for cupcakes, or until a toothpick inserted in the cake comes out clean. Cool and enjoy.

For a printer-friendly version of this recipe, click here.

Friday, March 5, 2010

Mini Apple Tarts


I had some pie crusts in the fridge that needed using, as well as apples on the counter suffering the same fate. Also, I have these cute little mini tart pans, and so this recipe came to be. This is a really quick dessert (or breakfast) to throw together, especially if you use the refrigerated dough.

Mini Apple Tarts

1 Refrigerated Pie Crust (or homemade)
2-3 Apples, Cored and Thinly Sliced
1 Tbsp (approximately) Sugar
3 Tbsp Apricot Jam
1 Tbsp Calvados, Rum, Water or Apple Brandy or Liqueur

Preheat oven to 350

Roll out and cut your pie crust to fit the mini tart pans. Press the crust into the pans and arrange the apple slices to fill the pans. Sprinkle with sugar and bake until the crust is nicely browned and the apples are soft, about 20-25 minutes.

Whisk together the apricot jam and liquid of choice. Brush over the tarts when they are warm out of the oven. Remove them from the pans and let them cool before enjoying.

For a printer-friendly version of this post, click here.

Monday, March 1, 2010

Alton Brown's Tres Leches Cake


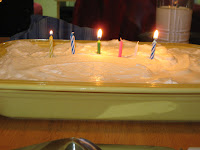
We made this tres leches cake yesterday, and while these photos certainly do not do it justice, the cake was AMAZING!

I made my husband take the leftovers to work with him so I wouldn't eat it all today. Seriously. I am not generally a fan of cakes, or desserts, or sweets in general. But this cake is really that good.

Do you like the binary number candles on the birthday cake?


The only change we made to the recipe was to use only 1/4 cup of sugar in the whipped cream topping and we found it plenty sweet.

Friday, February 12, 2010

Brownies


So this is one way to get my heart-shaped food. You can cut these brownies into any shape you like, not just traditional squares. I like my brownies chewy, and this recipe reflects that. If you prefer cake-like brownies, this one may not be for you.

I'm sure I don't need to tell you the myriad ways you can eat brownies. There is just plain, of course, or with ice cream, or whipped cream, or.....Well you get the idea. I hope you enjoy these with your sweetie. Or all by yourself if you don't feel like sharing. I won't tell anyone! ; )

3/4 Cup Melted Butter
1 1/2 Cups Sugar
1 1/2 tsp Vanilla
3 Eggs
3/4 Cup All Purpose Flour
1/2 Cup Unsweetened Cocoa Powder
1/2 tsp Baking Powder
1/2 tsp Salt
1 Cup Semi-Sweet Chocolate Chips

Preheat Oven to 350

Grease a 13 x 9 inch baking pan

Combine the butter, sugar, eggs, and vanilla in a mixer. Combine the flour, cocoa powder, baking powder and salt in a separate bowl. Add the flour mixture to the mixer and mix until combined. Stir in the chocolate chips.

Pour into the pan and bake for 20-22 minutes. Cool in the pan on a wire rack before cutting and serving.

For a printer friendly version of this recipe, click here.

Friday, December 18, 2009

Painted Sugar Cookies


This is by far the easiest way I know of to decorate cookies with small children. Make a "paint" of corn syrup and food coloring, and paint the cookies before baking for beautiful holiday treats and gifts. I got this recipe from the Food Network website years ago.

Painted Sugar Cookies

For the Cookies:

1/2 Cup Butter
1/2 Cup Shortening
1/2 Cup Sugar
1 Egg
1 tsp Vanilla Extract
1/2 tsp Baking Soda
1/2 tsp Salt
2 1/2 Cups All Purpose Flour


For the Paint:

4 tsp Corn Syrup
1 tsp Water
4 Colors of Food Coloring

Cream the butter, shortening, and sugar with an electric mixer. Add in the egg and vanilla extract, and beat until lighter in color. In a separate bowl, combine the soda, salt and flour. Stir the dry ingredients into the butter mixture until well combined. Wrap in wax paper and refrigerate for at least 30 minutes. Divide the dough in half, return half to the refrigerator with you work with the other half. Roll out the dough to about 1/8 inch thickness (mine are usually thicker, I think) on a lightly floured surface. Cut cookies with cookie cutters and place on a parchment lined baking sheet.

Put one tsp of corn syrup and 1/4 tsp water in each of 4 ramekins or other small bowls. Add food coloring to each bowl and stir well. Paint the unbaked cookies with paintbrushes.

Bake for 9-10 minutes in a preheated 375 degree oven. Move to wire racks to cool.

Wednesday, December 2, 2009

Apple Galette Recipe


Here is a really quick and easy dessert. It takes about 15 minutes to put together, plus about another 15-20 to bake.

Apple Galette

Preheat oven to 425

Dough for one pie crust (homemade or store-bought refrigerated)
2 Medium Apples
1 tsp or so Lemon Juice
2-4 tsp Sugar (Depending on the sweetness of your apples)
1/2 tsp Cinnamon (or more to taste)
Pinch Nutmeg

If you are using store-bought dough like me, pull it out of the fridge to defrost for 15 minutes. In the meantime, core and thinly slice the apples. Put them in a bowl and squeeze some lemon juice over to keep them from turning brown. Sprinkle with 2 tsp sugar and 1/2 tsp cinnamon, stir and taste for sweetness. Add more sugar or cinnamon as desired. Grate or sprinkle just a tiny bit of nutmeg and stir it in.

By now your dough should be defrosted. (Alternately, if you are using homemade, roll it out into about an 11 inch round. Put a piece of parchment paper on a baking sheet, and put your dough on it. Heap the apples in the center of the dough, leaving about a 3 inch border all the way around. No need to be neat here, this is a 'rustic' dessert! Fold dough border over the apples, but not all the way to the center of the pastry. There should be a circle of apples exposed in the center. Bake for 18-25 minutes until golden brown and delicious. Let cool before slicing and enjoying.

Thursday, November 26, 2009

Chocolate Cream Pie


I have had this pie at every Thanksgiving in my life, I am pretty sure. One of the best things about hosting Thanksgiving in my family is that you get to have this pie for breakfast the next morning! This one is pretty much straight out of the box when I make it. As much as I love cooking, and have even gotten into baking over the past little while, I still hate to make pie crust, so I use the refrigerated kind. My mother always made her own, as I am pretty sure the rest of my family does. Maybe I will try pie crust again in 2010, but for now, my DS declared that "people in heaven must eat this every day. Right before going to the arcade."


Happy Thanksgiving, everyone! I'll be back with more recipes next week.

Thursday, November 12, 2009

Fresh Apple Bread Recipe


I know, apples apples apples. I think this will be the last apple post, at least for this week! This apple bread is very very tasty, but I cannot claim it is health food by any stretch of the imagination.

Fresh Apple Bread

1 Cup All Purpose Flour
1 tsp Baking Soda
1/2 tsp Salt
1/2 tsp Cinnomon
1/4 Cup Shortening
1/4 Cup Butter
1 Cup Sugar
2 Eggs
1 Cup Finely Chopped Apple
1 1/2 Tbsp Milk
1/2 tsp Vanilla Extract

topping
1 Tbsp Sugar
1 1/2 tsp Cinnomon


Preheat oven to 350

Cream shortening, butter and sugar. Add eggs and mix well. Stir in apples, milk and vanilla extract. Mix dry ingredients together in a bowl, then add stir into the apple mixture. Pour into a greased loaf pan and sprinkle the topping over the batter. Bake for 50-60 minutes. This bread gets very dark in the oven, but boy is it good.

Wednesday, November 11, 2009

Apple Strippers Recipe


I am not exactly sure why these are called strippers. Maybe it's because they are made from strips of dough. Anyway, I have been making these cookies for the holidays with raspberry and apricot jam since I saw the recipe in Cooking Light Magazine in about 2002. I was inspired to do a fall version perhaps because I am still surrounded by apples. This recipe uses the apple butter we made yesterday.

Apple Strippers Recipe

Adapted from Cooking Light Magazine

1/3 Cup Sugar
5 Tbsp Butter, softened
1 1/2 tsp Vanilla Extract
1 Large Egg White
1 Cup All Purpose Flour
2 Tbsp Cornstarch
1/4 tsp Baking Powder
1/4 tsp Salt
Cooking Spray or Parchment Paper
1/3 Cup Apple Butter (or other jam-like product of your choice)
1/3 Cup Powdered Sugar
2 tsp Fresh Lemon Juice
1/2 tsp Almond Extract

Preheat Oven to 375

Beat sugar and butter with a mixer at medium speed until well blended, about 5 minutes. Add the vanilla and egg white, beat well. Combine the flour, cornstarch, baking powder and salt in a bowl. Add the flour mixture to the sugar mixture ans stir until well blended.

Turn the dough onto a lightly floured surface and divide it in two. Roll each half into a log about 12 inches long. Place the logs about 3 inches apart on a cookie sheet or baking pan coated with cooking spray (I used parchment paper instead). Using the handle of a wooden spoon, make a 1/2 inch indentation down the length of each log. Spoon the apple butter into the center. Bake for 20 minutes or until lightly browned. Remove to a cutting board.

Combine the powdered sugar, lemon juice, and almond extract. Stir well with a fork and drizzle over the logs. Cut each log diagonally into 12 slices, but don't pull the slices apart yet. Let rest on the cutting board for 10 minutes, then remove to a wire rack to cool.

Thursday, October 22, 2009

Apple Crisp


Between our two apple trees and the CSA share, we are still swimming in apples. This is a pretty quick and (relatively) healthy dessert. Leftovers can also stand in as a quick breakfast in a pinch!


Apple Crisp

4 large or 6 small apples (any variety-I like to use a combination)
1/4 cup Calvados (you could also use apple juice or even water)
1/2 cup brown sugar-divided
pinch of red pepper flakes
1/3 cup old fashioned oats
1/3 chopped nuts (I used walnuts this time, I also like it with almonds)
1/4 cup all purpose flour
1 1/2 tablespoons melted butter or margarine

Preheat the oven to 350

Core and dice the apples. No need to peel. Cook the apples over medium low heat with the Calvados, 1/4 cup brown sugar and pinch red pepper flakes until the apples are soft and most of the liquid has evaporated.

Transfer the apple mixture into a baking dish or individual ramekins.

Mix together the oats, nuts, 1/4 cup brown sugar, flour and melted butter or margarine. Spread this mixture over the apples and bake until hot and brown, about 15-20 minutes.